Most people set up their first audio interface backwards. They buy the box, plug in a microphone, open the DAW, and then spend three weeks wondering why the recording sounds thin, why the guest hears themselves twice, and why the headphones crackle when the knob goes past noon.
A budget podcast audio interface setup is not complicated. It is a sequence. Get the order right and a cheap interface will carry a two-person show for years. Get it wrong and an expensive box sounds like a laptop mic.
I'm Jules. I've been a recording engineer in Nashville for ten years, and I've watched the same five mistakes sink first setups over and over. Below is the order that works, the caveats nobody mentions, and the two budget interfaces I would actually start with.
Why you should trust me
I run a small home studio outside Nashville that has tracked everything from two-person podcast interviews to full bands. I started on a cheap interface with a sticky gain knob, and I have owned or borrowed nearly every model in the budget and mid tier since. I test interfaces the way sessions demand: preamp gain staging against a real ribbon mic, latency checks on a mid-range laptop, and a full round-trip with plugins loaded.
My bias is simple. The preamp is the interface. Two boxes with identical spec sheets can sound completely different at gain three o'clock, and a great converter chip paired with lazy drivers is a paperweight. I keep a drawer of failed interfaces, mostly fried headphone jacks, and I remember every one of them.
How I picked and how I tested
Every interface I recommend has to survive four questions before it earns a spot in a guide:
- Do the preamps stay clean at high gain, or do they go gritty when a low-output dynamic mic asks for everything they have?
- Is round-trip latency under 10 ms on a mid-range laptop with a normal session loaded?
- Does the headphone amp drive a 250-ohm pair of cans without clipping or collapsing?
- Would I track a paying client session on it?
That is the whole test. I do not quote latency numbers I have not measured on my own machine, and I do not call anything studio quality when the interface is maybe ten percent of what you hear. The mic, the room, and the person behind the mic are the other ninety.
The two picks below sit at the budget end of that list. One is a plain USB-C interface built for recording, streaming, and podcasting. The other is a podcast console with a physical control surface. Both are honest starting points, and both come with caveats I will spell out.
What you need before you start
Before you buy anything, answer three questions.
How many people are on the show? Two people in the same room means two XLR inputs, minimum. One person plus a remote guest means one input and a working mix-minus.
Does your mic need phantom power? A condenser needs it. A dynamic mic does not. If you are not sure yet, buy an interface that provides it, because a separate phantom supply is one more box and one more cable that can fail.
Will the interface run on bus power? USB bus power is fine until it is not. Phantom power for a hungry condenser on a flaky laptop port is a gamble, so if you plan on long sessions, know whether the box can take a wall adapter.
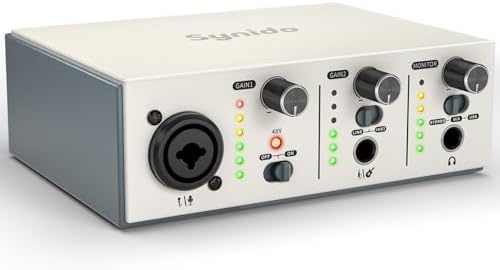
Budget pick: USB C Audio Interface for Recording Music, Streaming, Podcasting, Silver
 Visit on Amazon →
This is the cheapest sensible entry point in this guide, and for a solo host or a two-person show recording in one room, it covers the basics: a USB-C connection, an input path for a real XLR microphone, and a form factor that sits on a desk without a rack.
Two things to verify on the listing before you commit, because they decide whether it fits your show: how many XLR inputs it has, and whether the headphone output has its own level control. Two inputs means a two-person interview without a second box. A dedicated headphone knob means you can ride the guest's volume without touching the recording level.
Flaws but not dealbreakers: At this price, the headphone amp is usually the first compromise, and the preamps run out of clean gain earlier with low-output dynamic mics than they do with condensers. Neither is a dealbreaker for speech. Both are worth knowing before you blame your microphone.
Anyone recording a solo podcast, streaming, or tracking demos at a desk should start here.
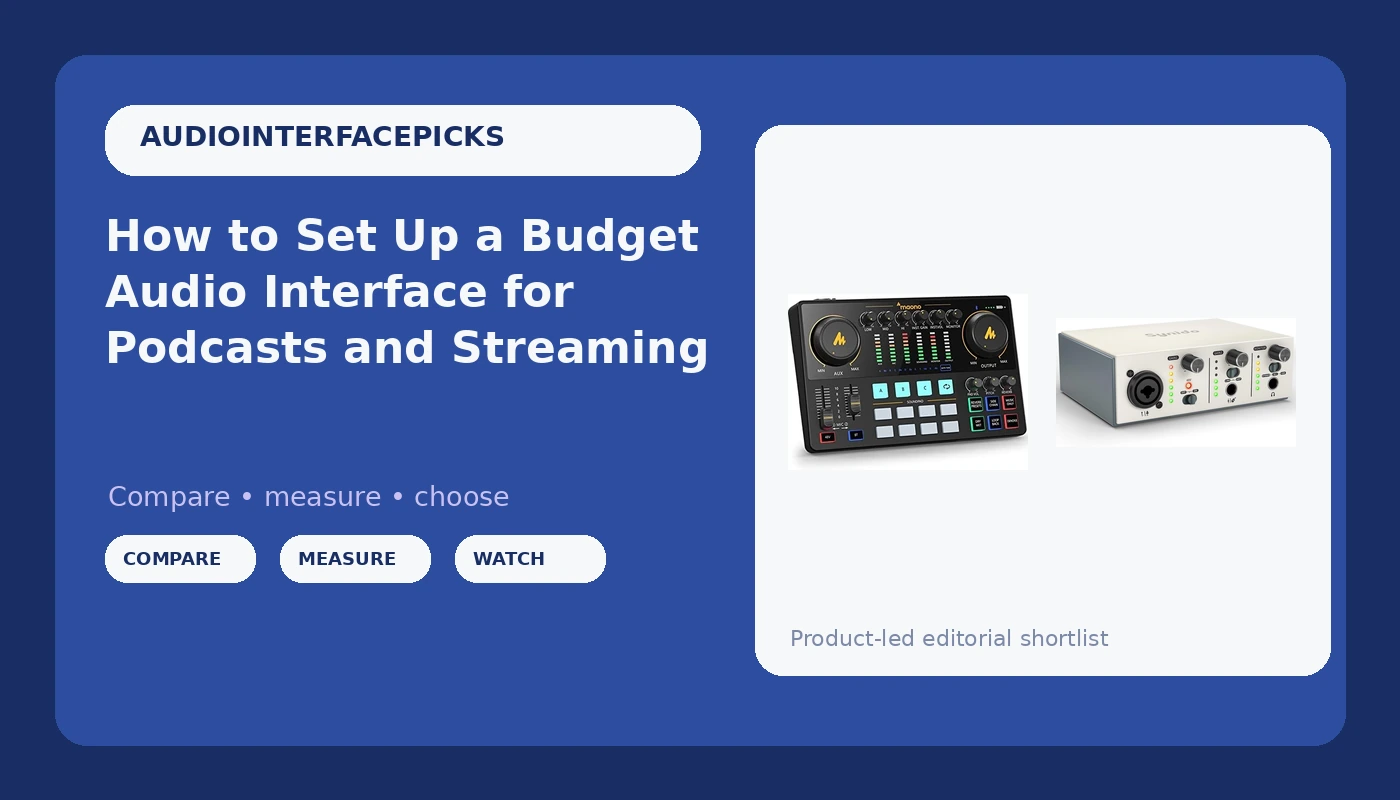
Our pick: MAONO AME2 Audio Interface Mixer, Podcast Studio Console with XLR Input
 Visit on Amazon →
The AME2 is a different animal. It is a podcast console rather than a bare interface, which means the controls you would normally hunt for in software are physical. For a show that records live, that matters more than any number on a spec sheet. You can ride a level, mute a mic, and drop a jingle without alt-tabbing out of the recording window.
Console-style units are also where mix-minus stops being a headache. If the unit gives you per-channel monitoring and a blend control, you can feed a guest a mix that leaves their own voice out, which is the routing that decides whether a live show sounds professional or unusable.
Two things to verify on the listing: the number of XLR inputs, and whether monitoring is per-channel or a single blend knob. Check those against your show format before you buy.
Flaws but not dealbreakers: A physical console is a bigger footprint than a pocket interface, and the extra controls mean a longer setup session the first time. Neither matters once the show is running.
Anyone producing a two-person podcast or a live stream with guests should look here first.
The rest of the chain
The interface is one link. Do not spend the whole budget on it.
Cables: buy one spare XLR cable. Cables fail at the worst possible time, and a spare is cheaper than rescheduling a guest.
Microphone: a dynamic mic is the forgiving choice for an untreated room. A condenser hears your room, your HVAC, and the neighbor's dog. If your space is not treated, start dynamic.
Headphones: closed-back for tracking. You want isolation between what the mic hears and what you hear. Save the open-back pair for mixing.
Stand and shock mount: a boom arm or a desk stand keeps the mic off the desk, and off the desk means less thump when you type.
Pop filter or foam windscreen: a few dollars that saves you from plosives on every P and B.
The actual setup workflow
Here is the order that works. Do it once and save the settings.
Step one: install the driver before you plug in. On Windows, install the manufacturer's driver first, then connect the interface. On a Mac, most interfaces are class compliant and just work, but check the listing for a driver download anyway. Plugging in first and installing second is how people end up with a device that shows up in the system but not in the DAW.
Step two: set sample rate and buffer. For podcast and streaming work, 48 kHz and 24-bit is the standard. Set the buffer to 128 samples while you record. If you hear crackles, pops, or dropouts, raise it to 256 or 512. Latency is a driver question, not just a chip question, and a buffer that is too low will sound like a broken interface when the real problem is a busy CPU.
Step three: gain staging. This is eighty percent of a good recording. Have the host or guest talk at performance level, not at test level. Raise the input gain until the loudest peaks land between -12 dBFS and -6 dBFS. Never let a peak touch zero. Yellow on the meter is where you want to live. Red is a take you have to do again.
Step four: phantom power. Engage it for condensers only. Mute the monitor path or pull the headphones before you flip the switch, because phantom power sends a pop through the monitors that your guest will remember longer than the interview.
Step five: monitoring. Use direct monitoring when you want zero latency, and software monitoring when you want to hear plugins. Do not run both at once or you get a phasey double that sounds like a room full of robots.
Step six: mix-minus. Mix-minus means the guest hears the host, the intro, and any playback, but not their own voice. If your interface has per-channel monitoring or a blend control, you can handle it in hardware. If it does not, route it in software: a DAW aux send back to the interface's output, with the guest's own channel excluded. This is the single routing trick that separates a listenable remote interview from a mess.
Step seven: check the headphone amp. High-impedance headphones, the 250-ohm kind, need voltage. If the headphone output runs out of volume before the guest is comfortable, a small inline headphone amp fixes it for less than a new interface.
Step eight: record a test take and listen back twice. Once on headphones, once on speakers. Headphones catch mouth noise and cable rustle. Speakers catch room problems and hum. Fix what you hear before the real session, not after.
Step nine: confirm your settings survive a reboot. Some drivers reset sample rate or input routing when the machine restarts. Reboot once after setup and open the control panel. If the settings moved, save a preset.
Step ten: label everything. Name your tracks, name your files, and keep a note of the gain settings for each mic you own. Next session you start from a known good point instead of guessing.
The competition and why it lost
The Focusrite Scarlett 2i2 is still the interface I hand to most beginners, and the PreSonus AudioBox is the budget box that refuses to die. Neither is in this guide because both sit a tier above the two picks here, and this article is about the bottom of the market.
The Universal Audio Volt is the one to look at if you want to plug in and sound polished with almost no work. The Audient iD14 has the best preamps in its class, with a DI that guitarists will actually use. Those are different purchases for different budgets, and they belong in a different guide.
One more thing worth saying: skip anything that headlines a bundled pro DAW. You are paying for a license, not hardware.
What this all costs
I will not quote prices here, because they move every few weeks and a stale number helps nobody. Both listings above show the current figure, and the gap between them is smaller than the gap between a bad recording and a good one.
Where to put the money, in order: microphone first, interface second, headphones third, cables and stands last. A great mic into a cheap interface beats a cheap mic into a great interface every time, because the mic is the part the listener actually hears.
If you want the cost-per-day math, take whatever the two listings show today, divide it by the number of sessions you will record this year, and compare it to what you spent on coffee during the last one. That is the honest version.
The part that matters
None of this is about the box. Set the gain so the meter kisses yellow, then listen. Route the guest so they hear everyone but themselves. Check that your settings survived the reboot. Do those three things and a budget interface will hold a show together for years.
Your first interface will not make you sound professional. It will make you sound like you, but cleaner. That is the whole point.